Introduction
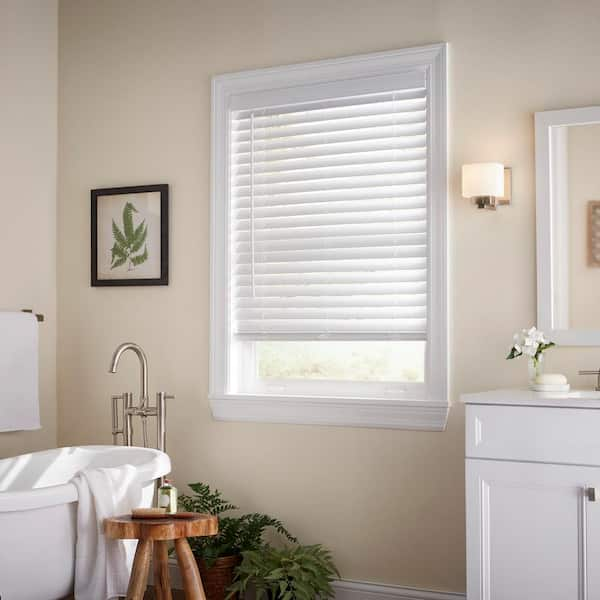
How to install blinds with metal brackets – Installing blinds with metal brackets is a straightforward process that can enhance both the functionality and aesthetic appeal of your windows. Whether you’re updating your home decor or seeking better light control, following these step-by-step instructions will ensure a secure and professional-looking installation.
Tools and Materials You’ll Need
Before starting, gather the necessary tools and materials:
- Blinds (make sure they fit your window measurements)
- Metal brackets
- Screws (usually provided with the blinds)
- Drill
- Screwdriver (electric or manual)
- Level
- Pencil
- Safety glasses
- Tape measure
- Hammer (optional, in case you need to tap the brackets into place)
Measure and Mark
Put on your safety glasses. Using a tape measure, find the center point of your window frame where you plan to install the blind’s headrail. Mark this spot lightly with a pencil. This is especially important if you’re installing multiple blinds side by side, as aligning them at the same height ensures a symmetrical appearance.
Determine Bracket Placement
Blind brackets typically come in pairs and are designed for either inside or outside mount installations:
- Inside Mount: If you’re mounting the blinds inside the window frame, position the brackets about 1.5 inches from the top of the frame on each side, ensuring they are level. Mark the screw holes.
- Outside Mount: For an outside mount, brackets should be installed above the window frame, typically 2-3 inches above and slightly wider than the blind’s width to ensure full coverage. Use a level to ensure straight alignment before marking the screw holes.
Drill Pilot Holes
Using a drill bit slightly smaller than the screws provided, drill pilot holes at each marked spot. This step makes it easier to screw in the brackets and prevents the wood from splitting.
Attach the Brackets
Hold the bracket against the wall or window frame, aligning the screw holes with those you’ve drilled. Use a screwdriver or drill to securely fasten the brackets in place. If the brackets feel loose or wobbly, check that the screws are tight and consider using additional screws or anchors if needed, especially in drywall where there might not be a stud.
Snap or Slide the Headrail onto the Brackets
With the brackets securely attached, it’s time to mount the blind. Depending on the design of your blinds, the headrail (the top part of the blind) may either snap into place on the brackets or slide onto them horizontally. Check the manufacturer’s instructions for specific guidance on how to attach your particular blind model.
Test and Adjust
Once the blind is mounted, test its operation by raising and lowering it a few times. Ensure it moves smoothly and locks into place properly. If necessary, adjust the tension or alignment according to the manufacturer’s instructions. This might involve twisting the tilt rod or adjusting the lift cords.
Additional Tips:
- Safety First: Always wear safety glasses when drilling to protect your eyes from debris.
- Double Check Measurements: Accurate measurements are crucial for a proper fit. Re-measure before drilling any holes.
- Cleaning: Before installation, wipe down the brackets and headrail with a soft cloth to remove any dust or packaging residue.
- Alignment: Use a level throughout the process to ensure your blinds hang straight. A crooked installation can detract from the overall look.
- Consider Hiring Help: If you’re uncomfortable using power tools or unsure about the installation process, consider hiring a professional handyman or using installation services offered by some retailers.
By following these steps carefully, you can successfully install blinds with metal brackets, adding both style and practicality to your living space.

Materials Needed:
- Blinds with Metal Brackets
- Screws (typically provided with the blinds)
- Screwdriver or Drill
- Level
- Measuring Tape
- Pencil
- Step Stool or Ladder (if necessary)
Step-by-Step Installation Guide:
1. Prepare the Area:
- Clear the window area of any obstructions that could interfere with installation.
- Ensure the blinds are unpackaged and all parts are accounted for, including the metal brackets and screws.
2. Measure and Mark:
- Inside Mount: Measure the width of the window inside the frame where the blinds will be mounted. Note down the measurement.
- Outside Mount: Measure the width of the window frame or the desired width of the blinds if you prefer them to extend beyond the window frame. Again, note down this measurement.
3. Position the Brackets:
- Based on your measurements and whether you are mounting inside or outside the window frame, position the metal brackets accordingly.
- Inside Mount: Place the brackets inside the window frame at the top corners. Ensure they are aligned symmetrically.
- Outside Mount: Position the brackets on the wall or window frame where the blinds will be installed. Use a level to ensure they are straight.
4. Mark Screw Holes:
- Use a pencil to mark where the screw holes on each bracket will be placed. Double-check the alignment and levelness before marking.
5. Pre-Drill Holes (if necessary):
- Depending on the material of your window frame or wall, you may need to pre-drill pilot holes for the screws. This helps prevent cracking or splitting.
6. Attach Brackets:
- Line up the metal brackets with the marked holes.
- Use screws provided with the blinds or recommended for the installation. Tighten them securely into place using a screwdriver or drill, but be careful not to over-tighten to avoid damaging the brackets or the wall/window frame.
7. Mount the Blinds:
- Once the brackets are securely attached, place the headrail of the blinds into the metal brackets.
- Depending on the style of blinds, there may be a locking mechanism on the brackets that secures the blinds in place. Follow the manufacturer’s instructions to ensure the blinds are properly seated.
8. Test and Adjust:
- Operate the blinds to ensure they function smoothly.
- Adjust the blinds to ensure they are level and centered within the window frame or as desired for outside mount installations.
9. Final Checks:
- Verify that all screws are securely tightened.
- Clean up any debris or markings from the installation process.
Tips for Success:
- Measure Twice, Install Once: Double-check all measurements before drilling or screwing.
- Use a Level: This ensures your blinds hang straight and look professional.
- Follow Instructions: Refer to the manufacturer’s specific guidelines for any nuances related to your blinds or brackets.
By following these steps carefully, you can successfully install blinds with metal brackets, enhancing both the functionality and aesthetic appeal of your windows. If you encounter any issues or uncertainties during installation, don’t hesitate to consult the manufacturer’s instructions or seek assistance from a professional installer.
Step-by-Step Installation Guide (Continued):
Prepare the Area:
- Before starting, ensure the window area is clean and free from dust or debris. This will make the installation process easier and help prevent any damage to your blinds or window treatments.
Measure and Mark (Detailed):
- Inside Mount: Measure the width inside the window frame where the blinds will sit. Measure at the top, middle, and bottom of the window to account for any variations in the frame’s width.
- Outside Mount: Measure the width of the window frame or the desired width of the blinds beyond the window. Add extra width if you prefer the blinds to overlap the window frame for better light control and privacy.
- Height Measurement: Determine the height at which you want the blinds to hang.
Position the Brackets:
- Inside Mount: Place the metal brackets at the top corners inside the window frame. Ensure they are aligned evenly and symmetrically. Use a level to check that they are straight.
- Outside Mount: Again, use a level to ensure they are straight and evenly spaced.
Mark Screw Holes:
- Using a pencil, mark the screw holes through the holes in the brackets onto the window frame or wall. Double-check the markings to ensure they align correctly with the brackets.
Pre-Drill Holes (if necessary):
- Depending on the material of your window frame or wall (e.g., wood, drywall, concrete), you may need to pre-drill pilot holes for the screws. Choose a drill bit size slightly smaller than the diameter of the screws to ensure a secure fit.
- Tip: If you’re uncertain about drilling into certain materials, start with a smaller drill bit for pilot holes and gradually increase the size if needed to avoid over-sizing the holes.
Attach Brackets:
- Line up the metal brackets with the pre-drilled holes or pencil marks on the window frame or wall.
- Insert the screws provided with your blinds into the brackets and into the pilot holes. Use a screwdriver or drill to tighten the screws securely. Be cautious not to over-tighten, as this could strip the screw holes or damage the brackets.
Test and Adjust:
- Operate the blinds by pulling the lift cords or using any control mechanisms (like a wand or remote) to ensure they function smoothly and without obstruction.
- Level Check: Use a spirit level to verify that the blinds are hanging straight and level. Adjust the brackets if necessary to correct any misalignment.
Final Checks:
- Once satisfied with the installation, tighten any remaining screws and ensure all components are securely in place.
- Clean up any debris or markings left from the installation process using a soft cloth or vacuum.