
Introduction
How to fix broken blinds – Window blinds not only enhance the aesthetic appeal of your home but also provide privacy and control over natural light. Over time, however, wear and tear can cause various issues that may hinder their functionality. Before rushing to replace them, consider repairing your broken blinds with these easy-to-follow DIY steps. This guide will cover common problems such as broken slats, tangled cords, stuck mechanisms, and damaged tilt rods, empowering you to restore your blinds to their former glory.
Identifying the Problem
Before diving into repairs, it’s crucial to accurately diagnose the issue at hand. Some common blind problems include:
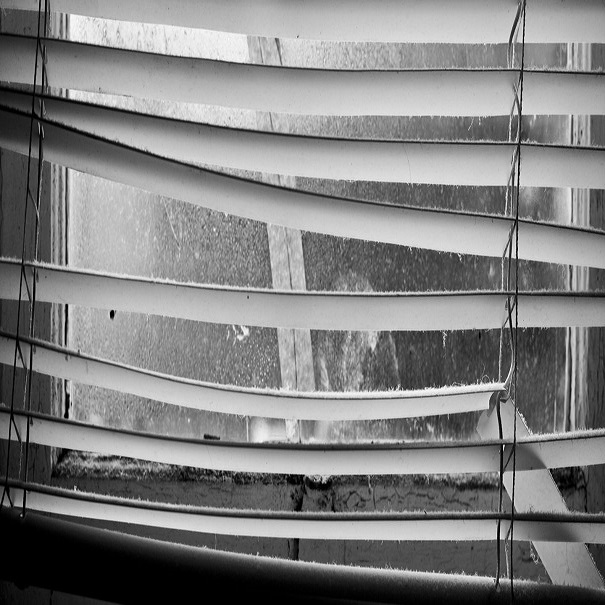
- Broken or bent slats: Often caused by accidental impact or pressure.
- Tangled or broken lift cords: Can result from excessive force or natural wear.
- Stuck mechanism: When blinds won’t raise or lower smoothly, usually due to dust buildup or misalignment.
- Damaged tilt rod: The mechanism controlling the angle of the slats might break or become disconnected.
Tools and Materials You’ll Need
Gather the following tools and materials before starting any repair work:
- Screwdrivers (flathead and Phillips)
- Pliers
- Scissors or wire cutters
- Replacement slats (if needed)
- Cordless drill
- New lift cords or tilt mechanism (if replacing)
- Blind repair clips or glue
- Cleaning cloth
- Mild detergent or blind cleaner
Repairing Broken or Bent Slats
Remove the damaged slat(s) by unclipping it from the ladder strings or using pliers to detach the end caps if necessary.
If the slat is bent, try gently straightening it with your hands or by laying it flat and applying even pressure. For severe bends or breaks, replace the slat with a matching one.
Reattach the repaired or new slat, ensuring it aligns correctly with the others.
Fixing Tangled or Broken Lift Cords
Untangle any knots in the cords first. If a cord is broken, remove all lift cords and the bottom rail.
Measure and cut new cords to match the old ones, adding a few extra inches for tying knots.
Re-thread the new cords through the holes in the bottom rail, then up through the blind, following the path of the old cords.
Tie secure knots at the top, ensuring equal tension on each cord. Trim excess cord and reinstall the bottom rail.
Dealing with a Stuck Mechanism
Dust and clean the mechanism thoroughly using a soft brush attachment on a vacuum or a damp cloth with mild detergent.
Apply a silicone-based lubricant to moving parts like the headrail tracks and wands to reduce friction.
Check for any misaligned parts and gently adjust them back into place using a screwdriver.
Repairing a Damaged Tilt Rod
Identify where the tilt rod is disconnected or damaged. If it’s a connection issue, use super glue or a blind repair clip to reattach it.
For a severely damaged tilt rod, you may need to replace the entire mechanism. Unscrew and remove the old tilt mechanism and install a new one following the manufacturer’s instructions.
Final Touches and Maintenance
- Test your blinds thoroughly after each repair to ensure they’re functioning correctly.
- Regularly dust and clean your blinds to prevent future issues. Use a microfiber cloth or a vacuum cleaner with a brush attachment for gentle cleaning.
- Avoid excessive force when operating blinds to prolong their lifespan.
By following this comprehensive DIY guide, you can effectively tackle common blind issues, saving money and giving your window treatments a new lease on life. Remember, patience and attention to detail are key to successful repairs. If you encounter more complex problems or lack the confidence to proceed, consulting a professional might be advisable.
Tools and Materials You Might Need:
- Replacement Parts: Depending on the type of blinds you have, you may need replacement slats, blind cords, tilt mechanisms, or brackets.
- Screwdriver Set: To remove screws and access internal mechanisms.
- Pliers: Useful for handling small parts and tightening components.
- Scissors: For cutting new blind cords or trimming excess material.
- Tape Measure: To ensure accurate measurements for replacement parts.
- Super Glue or Adhesive: For repairing broken slats or components.
- Needle and Thread: Handy for repairing fabric blinds or sewing new cord loops.
Common Blind Issues and How to Fix Them:
Slats Won’t Tilt or Stay in Position:
- Issue: The tilt mechanism may be broken or stuck.
- Solution:
- Remove the blinds from the window.
- Inspect the tilt mechanism for damage or obstruction.
- Replace the tilt rod or mechanism if necessary.
- Lubricate moving parts with silicone spray for smooth operation.
Broken or Damaged Slats:
- Issue: Individual slats are cracked, warped, or broken.
- Solution:
- Remove the damaged slats from the blind.
- Measure and cut replacement slats to size if needed.
- Use super glue or adhesive to attach new slats.
- Allow adequate drying time before reinstalling.
Snapped or Tangled Cords:
- Issue: Blind cords are frayed, tangled, or broken.
- Solution:
- Replace the cord entirely if it’s severely damaged.
- Untangle knots carefully using a needle or tweezers.
- Use a cord connector to repair breaks or splices.
- Ensure cords are properly tensioned and aligned.
Lack of Tension or Sagging Blinds:
- Issue: Blinds do not remain taut when raised or lowered.
- Solution:
- Adjust the tension spring inside the headrail.
- Tighten the lift cords to achieve desired tension.
- Replace worn-out cord locks or brackets.
Stuck or Jammed Mechanisms:
- Issue: The blinds are stuck in the raised, lowered, or tilted position.
- Solution:
- Inspect the lift mechanism for debris or obstruction.
- Clean and lubricate gears, pulleys, or tracks as needed.
- Check for bent or misaligned components and straighten them.
Fabric or Roller Blind Issues:
- Issue: Fabric is torn, faded, or worn out.
- Solution:
- Mend tears with needle and thread or fabric glue.
- Replace the fabric if it’s irreparable or heavily damaged.
- Clean fabric blinds regularly to prevent buildup of dust or grime.
Safety Tips:
- Disconnect Power: If working near electrical blinds, ensure power is disconnected to prevent accidents.
- Use Ladder Safely: When working at height, use a sturdy ladder and have someone assist you if needed.
- Protect Flooring and Furniture: Lay down a drop cloth or old sheet to catch debris and prevent damage.
Maintenance Tips to Prevent Future Issues:
- Regular Cleaning: Dust blinds frequently to prevent buildup that can lead to operational issues.
- Inspect Periodically: Check cords, mechanisms, and slats for signs of wear and tear.
- Avoid Excessive Force: Handle blinds gently to prevent damage during use or cleaning.
Straightening Bent or Crooked Slats
Bent slats are a common issue, especially with aluminum or vinyl blinds. To fix this:
- Step 1: Lower the blind fully and identify the bent slat.
- Step 2: Gently hold the slat on either side with your fingers.
- Step 3: Apply gentle pressure to reshape the slat, working from the center outwards. Use a hairdryer on low heat to soften the material slightly if needed (be cautious not to overheat).
- Step 4: Once straightened, adjust the tilt mechanism to ensure the slat aligns properly with others.
Replacing Broken Slats
If a slat is beyond repair, you may need to replace it:
- Locate the broken slat and remove it by popping out the end caps or unscrewing the brackets holding it in place.
- Measure the width of the slat and order a replacement from the manufacturer or find a close match at a home improvement store.
- Install the new slat by sliding it into place and securing with the original hardware or new end caps.
Conclusion:
By following this DIY guide, you can tackle common issues with your blinds and restore them to optimal functionality without the need for professional help. Repairing broken blinds not only saves money but also ensures your window treatments continue to enhance your home’s decor and functionality for years to come. Take your time, follow safety precautions, and enjoy the satisfaction of a job well done as you revive your blinds with these easy steps.