Selecting the Right Blinds for Your Windows
How to change blinds – Selecting the right blinds is a key step in enhancing your room’s aesthetic and functionality. Begin by assessing your room’s decor and light requirements. Consider the style of blinds that will match your interior. Do you prefer a modern or traditional look? Next, think about material. Wood and faux wood offer warmth, whereas metal and vinyl provide a sleek appearance.
Privacy and light control are essential factors. Blackout blinds suit bedrooms, while light-filtering options are ideal for living areas. Don’t forget about insulation properties. Energy-efficient blinds can help to reduce your heating and cooling costs. Lastly, factor in ease of cleaning. Dust can gather on blinds, so choose a material that is simple to maintain.
By considering these elements, you will select the best blinds for your needs. Remember to keep your ‘how to change blinds’ process in mind for future ease of replacement. With these tips and a bit of research, you’ll find the ideal window treatment for your space.
 Necessary Tools and Materials for Replacing Blinds
Before you begin the process of how to change blinds, gathering the necessary tools and materials is crucial. You don’t want to be midway through the installation only to realize you’re missing a key item. Here’s what you will typically need:
- Measuring Tape: To ensure you buy the right size blinds.
- Screwdriver or Drill: Depending on the type of bracket your blinds use.
- Level: To make sure your blinds hang straight.
- Pencil: For marking where to place the brackets.
- Brackets and Screws: Usually provided with the blinds; check before leaving the store.
- Utility Knife or Hacksaw: If you need to trim the blinds to fit your window.
- Safety Gear: Glasses to protect your eyes from dust or debris.
Ensure that you have all these tools and materials ready before starting the replacement process. Having the right tools will make the process of changing blinds smoother and prevent any unnecessary frustration or delays.
Removing Old Blinds Safely
When the time comes to replace your blinds, removing the old ones safely is crucial. This step will prevent damage to your walls and windows and ensure personal safety. Here’s how to change blinds by taking down the old set easily and safely:
- First, open the blinds completely to access the brackets. This might involve rotating the slats or pulling up the cord.
- Before you do anything else, put on your safety gear, including glasses, to protect your eyes from dust or falling debris.
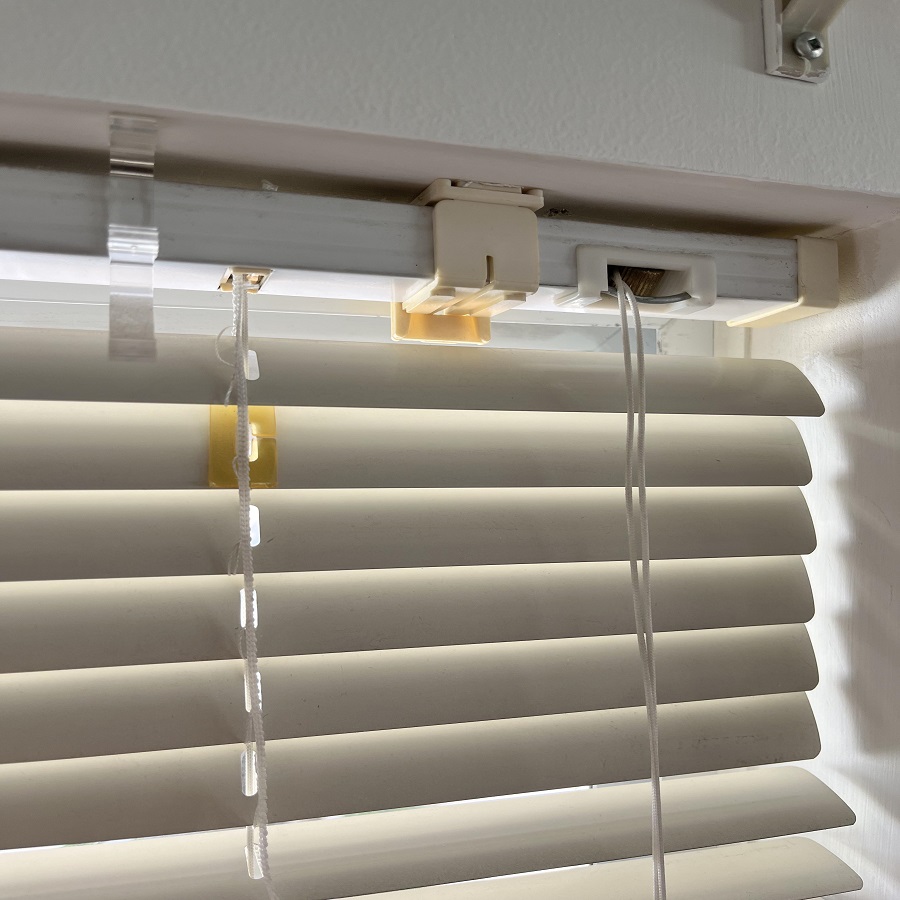
- Next, locate the brackets that hold the blinds in place. These are often at the top on the inside part of the window frame. Some blinds have a cover over the bracket that you’ll need to remove.
- Gently push back on the tabs or open the bracket doors using a screwdriver. This will release the tension and allow you to slide the blinds out.
- Carefully hold the blinds with both hands as you detach them from the brackets. Avoid allowing the blinds to fall suddenly, as this may cause injury or damage.
- Once the blinds are free from the brackets, lower them down and away from the window area.
Through these steps, you can ensure safe removal of your old blinds, setting the stage for a trouble-free installation of your new window treatments. Remember to pace yourself and handle each component with care to avoid accidents or damage.
Measuring Your Window for the New Blinds
When you know how to change blinds, measuring your window is key. Accurate measurements ensure a perfect fit. Use a measuring tape to find the width. Measure from the left to the right inside edges of the window frame. Write this number down. Repeat this for the height, measuring top to bottom. An important tip: measure twice. This way, you avoid mistakes. For inside-mount blinds, measure within the window recess. For outside-mount, include the desired overlap. Typically, this is an inch or two beyond the window frame. Be precise. Even small errors can lead to blinds that do not fit well. Remember to keep your measuring tape level for accurate readings. If you’re unsure, measure again. It’s better to double-check now than to face issues during installation.
Installing the New Blinds
After measuring your window and getting the right size blinds, it’s time for installation. Installing the new blinds can be straightforward if you follow these steps carefully:
- Attach the Brackets: Secure your new brackets into place where you marked earlier with your pencil. Use your drill or screwdriver and provided screws to affix them firmly. Make sure the brackets are level before tightening the screws.
- Insert the Blinds: With the brackets installed, slide the headrail of the blinds into the brackets. Click them into place, ensuring a snug fit. If you’ve got a clip-on valance or cover, attach it now.
- Secure the Blinds: Close the brackets if they have doors, or snap the headrail into place according to the type of bracket you have. This step locks the blinds securely within the window frame.
- Adjust the Length: If the blinds are too long, remove the slats from the bottom to adjust their height. Refer to the manufacturer’s instructions for the best way to do this.
- Add the Cleats: If your blinds have cords, installing cleats on the side of the window frame will keep them tidy and safe. Wrap the cords around the cleats when the blinds are raised.
- Test the Blinds: Pull down on the cord to lower the blinds. Tilt them to check if they close properly. Raise them to make sure they can go up evenly and smoothly.
Once installed, take a step back and check if the blinds hang straight and function well. If you encounter any resistance or alignment issues, adjust the brackets slightly. With patience and precision, you’ll have the new blinds up and enhancing your room in no time.
Adjusting and Testing Your New Blinds
After you have installed your new blinds, it’s important to adjust and test them. This ensures they work correctly and look great. Here are the steps to follow:
- Check the Length: Confirm that the blinds are the proper length for your window. If they’re too long, remove extra slats from the bottom.
- Test the Mechanism: Lower and raise the blinds several times. The action should be smooth.
- Adjust the Slats: Tilt the slats in various angles. Make sure they move evenly and lock in place firmly.
- Inspect for Gaps: Look for any gaps where light might come through. Small adjustments to the brackets may fix these.
- Ensure Safety: If your blinds have cords, secure them out of reach of children and pets.
Make minor tweaks until you’re happy with how the blinds function and appear. Remember, patience is key. Don’t rush and make sure every part is secure and operating smoothly. Once you complete these steps, you’ll enjoy the full benefits of your new blinds.
Tips for Maintaining Your Blinds for Longevity
To keep your blinds looking and functioning their best for years, regular maintenance is essential. Here are simple tips to extend the life of your new window treatments:
- Clean Regularly: Dust accumulates on blinds easily. Wipe them with a soft cloth or duster every week.
- Use Gentle Cleaning Agents: If your blinds need a deeper clean, use mild detergents and avoid harsh chemicals that can damage materials.
- Handle with Care: When adjusting your blinds, be gentle. Rough use can lead to wear and tear over time.
- Watch for Moisture: Moisture can damage blinds, especially wood or faux wood ones. Dry any damp spots immediately.
- Avoid Direct Sunlight: Over time, the sun can fade the color of your blinds. Use protective window films if necessary.
- Check Mechanisms: Periodically, ensure that the mechanisms work smoothly. If you feel any resistance, investigate and fix the issue.
- Repair Minor Damage Promptly: If you notice frays or breaks, address them right away to prevent further issues.
By following these steps on how to change blinds and properly maintain them, you can enjoy your blinds without the need for frequent replacements or repairs. Keep these tips in mind for blinds that look good as new, year after year.
Troubleshooting Common Issues After Installation
After you learn how to change blinds and have them installed, you may face some common issues. It’s best to address these promptly. Here’s what you might encounter and how to fix them:
- Blinds Won’t Lower or Raise Properly: If the blinds don’t move smoothly, check for any tangles or kinks in the cords. Untangle them carefully. Also, make sure the cord lock mechanism is not stuck.
- Uneven Blinds: Should the blinds appear uneven, try pulling the cord at different angles. You might also need to adjust the mounting brackets slightly.
- Slats Won’t Tilt Correctly: Sometimes slats could be stiff. If they don’t tilt well, see if they’re jammed. Gently wiggle them to loosen any obstruction.
- Blinds Too Noisy: Blinds should operate quietly. If there’s noise, check if any parts are loose. Tighten any screws that might have come undone.
- Light Gaps: For unwanted light gaps, ensure the blinds fit snugly. Check the width and height again, and adjust if necessary. Blinds should fully cover the window frame for best light control.
If these steps do not solve the issues, refer back to the manufacturer’s guide. Remember, it’s crucial to tackle these problems early to keep your blinds in optimal condition. Addressing issues right after installation helps maintain your blinds’ look and functionality for the long term.